Cloudflare Zaraz - Using the HTTP Request Tool for Trigger setup / debug

Aside from its regular use-case, the HTTP Request tool can be used to verify combinations of “Firing Triggers” and “Blocking Triggers” and provide confidence that the triggers are doing what we expect.
The following instructions detail a simple setup to allow HTTP requests to be received from the Cloudflare HTTP Request Tool and then trigger it so we can see it do its thing.
1. Setup a local listener
It could be as simple as a netcat session, but I’m using the fully featured httpbin server via a docker image
| |
2. Setup an external route to our local listener
Use ngrok (in another terminal window, if necessary) to create a public url for our local listener
| |
NOTE:
- Use the
Forwardingurl as the domain for our HTTP requests, for example:https://ef1b-8-20-101-43.ngrok.io/
- Use the local
Web Interfaceto monitor those HTTP requests, for example:http://127.0.0.1:4040
Check it’s all working via a browser, or from the command line with something like:
| |
We should see our connection attempts appear in the local Web Interface.
3. Create our HTTP Request tool
At the Cloudflare Zaraz Dashboard, create a new HTTP Request tool and setup the following “Action”
- Name:
Test Trigger - Firing Triggers:
Pageview(initially) - Blocking Triggers: NONE (initially)
- Endpoint: use
ngrok’s Forwarding address andhttpbin’s simple “200 status” path to create an identifiable endpoint for our requests, for example:https://ef1b-8-20-101-43.ngrok.io/status/200?TestTrigger
- HTTP Method:
POST JSON - Send all System and Client data:
Enable
Use
With our “Test Trigger” HTTP Request tool enabled in the Cloudflare Zaraz Dashboard, each time a page is loaded from our website, the pageview data will appear in the ngrok local Web Interface. 😎
Of course, we can now change the combination of Firing Triggers and/or Blocking Triggers in our “Test Trigger” HTTP Request tool to contain any other triggers that we may add to our Cloudflare Zaraz Dashboard in order to prove they allow (or deny) trigger requirements that we may require for other tools.
Adding other triggers
Trigger Name: NOT dev
Make your first ‘Trigger’ (rule) restrict triggering to just your dev sub domain or site…
I’m able to run up a dev version of my site on a sub domain, away from the production version, so this Trigger (rule) keeps my experimentation away from prod 🤓
Match Rules…
- Rule type:
Match Rule - Variable name:
{{ system.page.url.hostname }} - Match operation:
Not matches regex - Match string:
^dev\.yourdomain\.com$(use YOUR dev sub domain or site!)
Use that ’trigger’ (rule) to BLOCK pages that aren’t from your dev subdomain by adding it as a Blocking Trigger in an action. For example, here it is being used in the Test Trigger (setup above) so that non dev pages don’t trigger the tool…

Keep Test Triggers Around
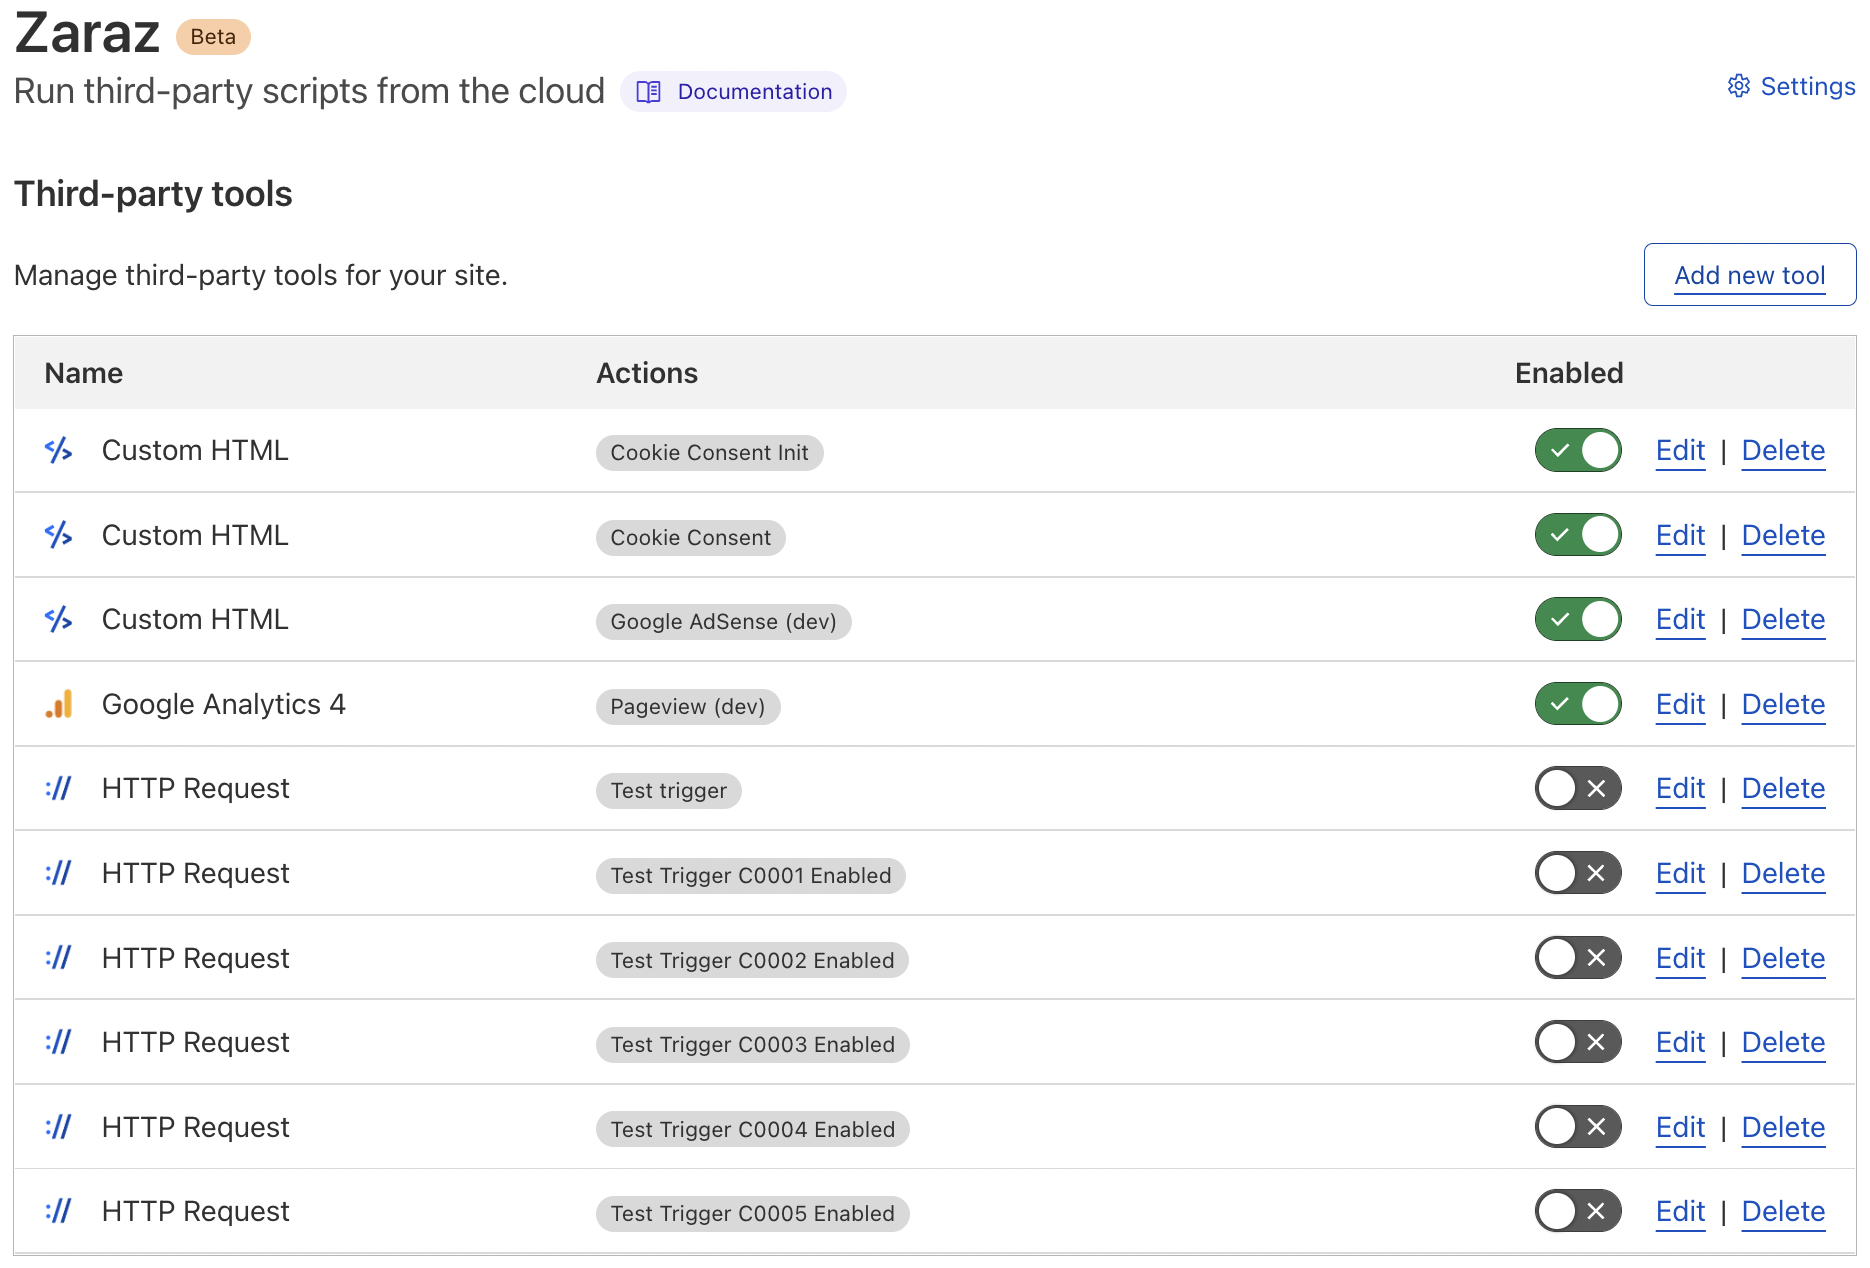
Here’s a Zaraz Dashboard screenshot for a domain that I’m currently setting up cookie control on. Each cookie group required its own triggering, to control deployment of Google AdSense and Analytics, etc, depending on the user’s preferences of course. I may end up deleting them at some point, but for now they’re simply disabled while I’m still developing other areas (in case I need to check anything). I’ll be detailing the cookie control setup and its triggering in another post.
That’s All
As a playground for experimenting with triggers and rules, I hope you find the above to be of use ❤️
Annex
Alternative Options For Handling HTTP Requests
Having tried different methods, the choice of ngrok and httpbin is my preferred solution as I like the ngrok UI for viewing traffic 🤓.
However, alternative solutions include the following.
1. Use a Cloudflare Zero Trust Tunnel rather than ngrok
This solution still uses httpbin locally (see step 1, above), but we access it via a cloudflared tunnel. The downside of this solution is that there’s no way to see your connection data. ngrok’s Web Interface shows the connection details very nicely! Regardless, if you want to replace ngrok with cloudflared, here’s how it can be done. See Cloudflare Zero Trust - Connect an application for full details, but a working summary is shown here:
| |
Delete when finished!
| |
In order to avoid a dangling subdomain, (manually) delete the DNS record too…
- Log in to the Cloudflare dashboard
- Navigate to DNS
- Locate the “testtrigger” DNS record under the DNS management card
- Click Edit > Delete
2. Use a hosted solution, such as pipedream.com
Whilst this would to do away with your local machine requirements entirely, this solution may depend on how sensitive your data is and whether you like the interface and setup offered by the provider.